10th August 2017
My Top 10 Tips for Indoor Photography
Our lovely studio assistant Kimberley’s top 10 tips for Indoor photography…
Are you feeling frustrated with indoor photography with your new fancy camera, and want to get the best out of it?
Well here are my top 10 tips for Indoor photography – I hope you find them useful!
Harsh shadows and weird skin tones are common problems. Working with natural light indoors can be a little tricky. These beginner tips will help you create beautiful photos using natural light.
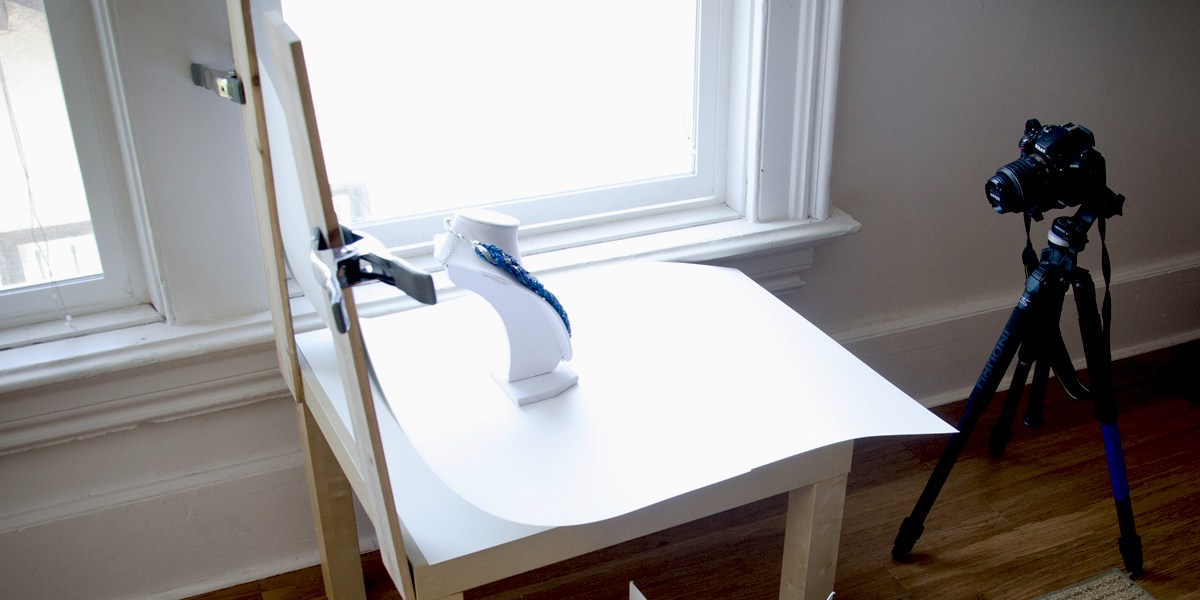
1. It’s all about the windows and doors
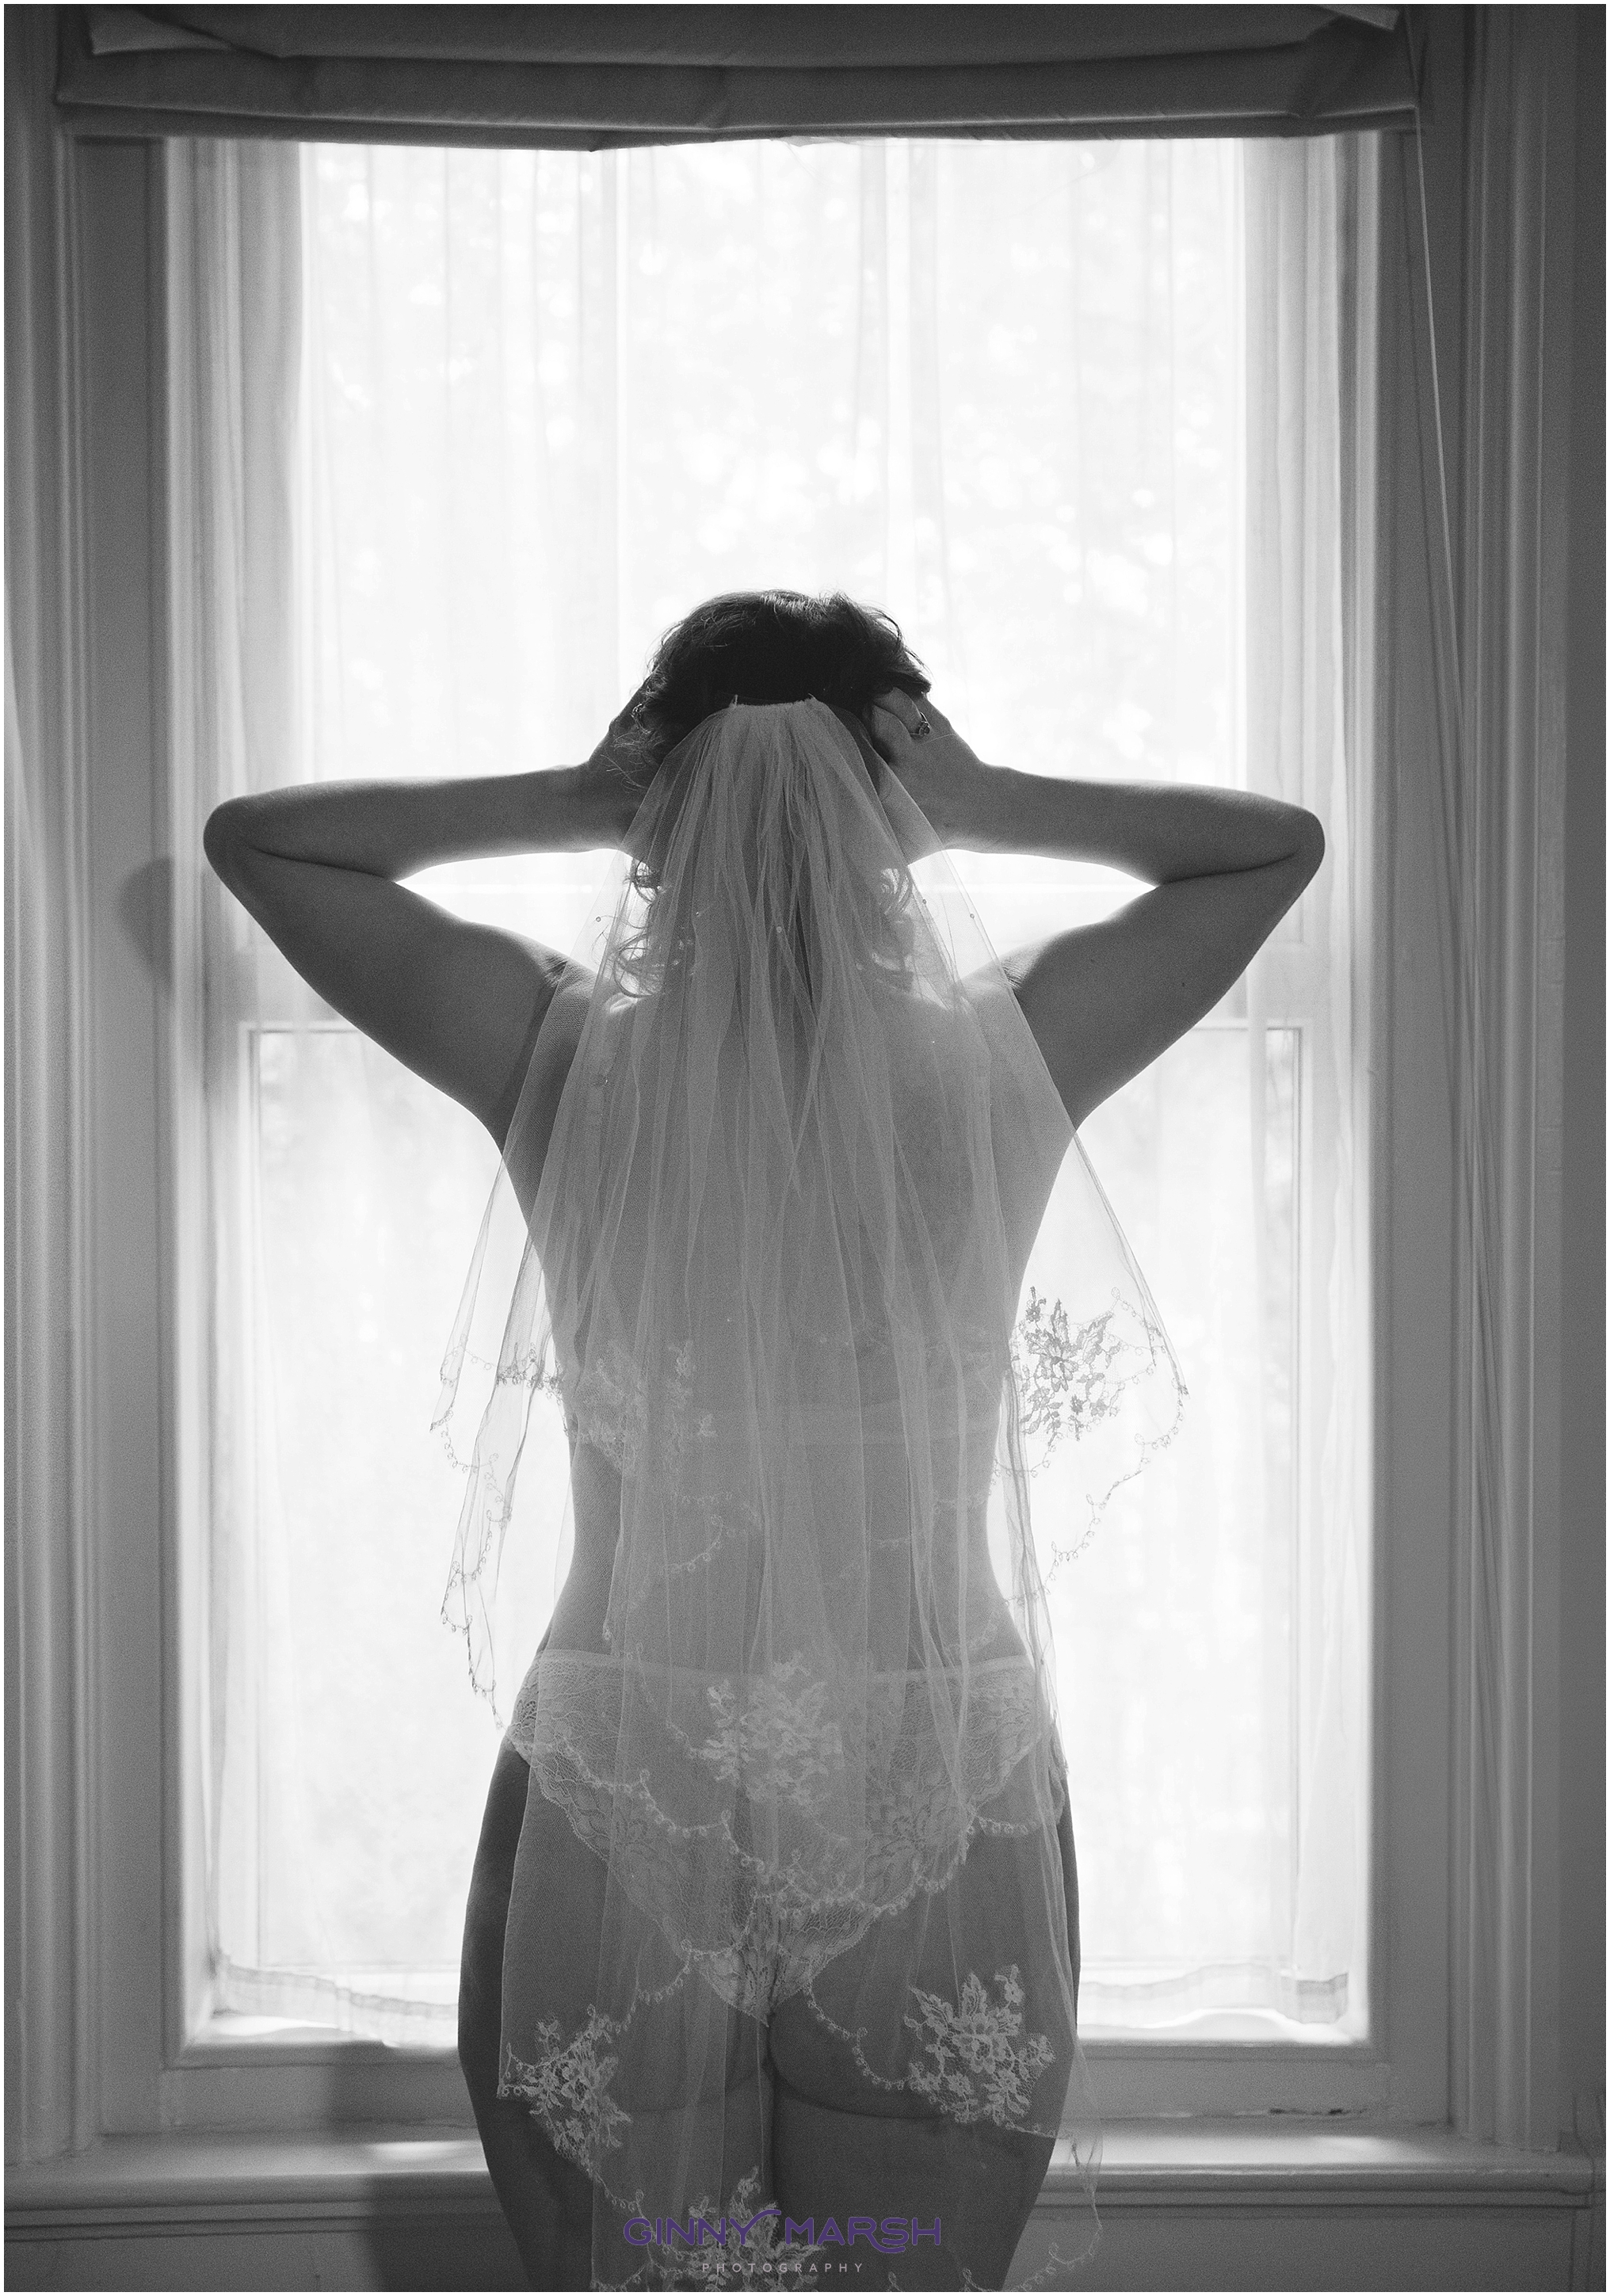
There are lots of varieties of lighting you can use for indoor photography. If you use net curtains or blinds you can diffuse and soften the light to eliminate harsh shadows.
You’ll want to get to know the light that comes through them. Sometimes it floods the room softly. Other times it beams in, bouncing off the walls and floor.
Soft light will add a soft glow, and harsh light will give a dramatic or moody look.
Take note of what kind of light enters each room throughout the day.
The colour of light also changes during the day. It has a warmer look at sunrise and sunset. During midday, it has a cooler or neutral colour. Use this to add different effects to your photos.
2. Turn off the lights
Natural light doesn’t like competition. Household lights can affect your white balance by turning your images orange. This is because the colour of light varies with the source. Skin tones can look odd when artificial light mixes with natural light. The easiest way to fix this problem is by turning off all household lights (as long as you’ve got good natural light coming from a window).
3. Shoot in Aperture Priority mode
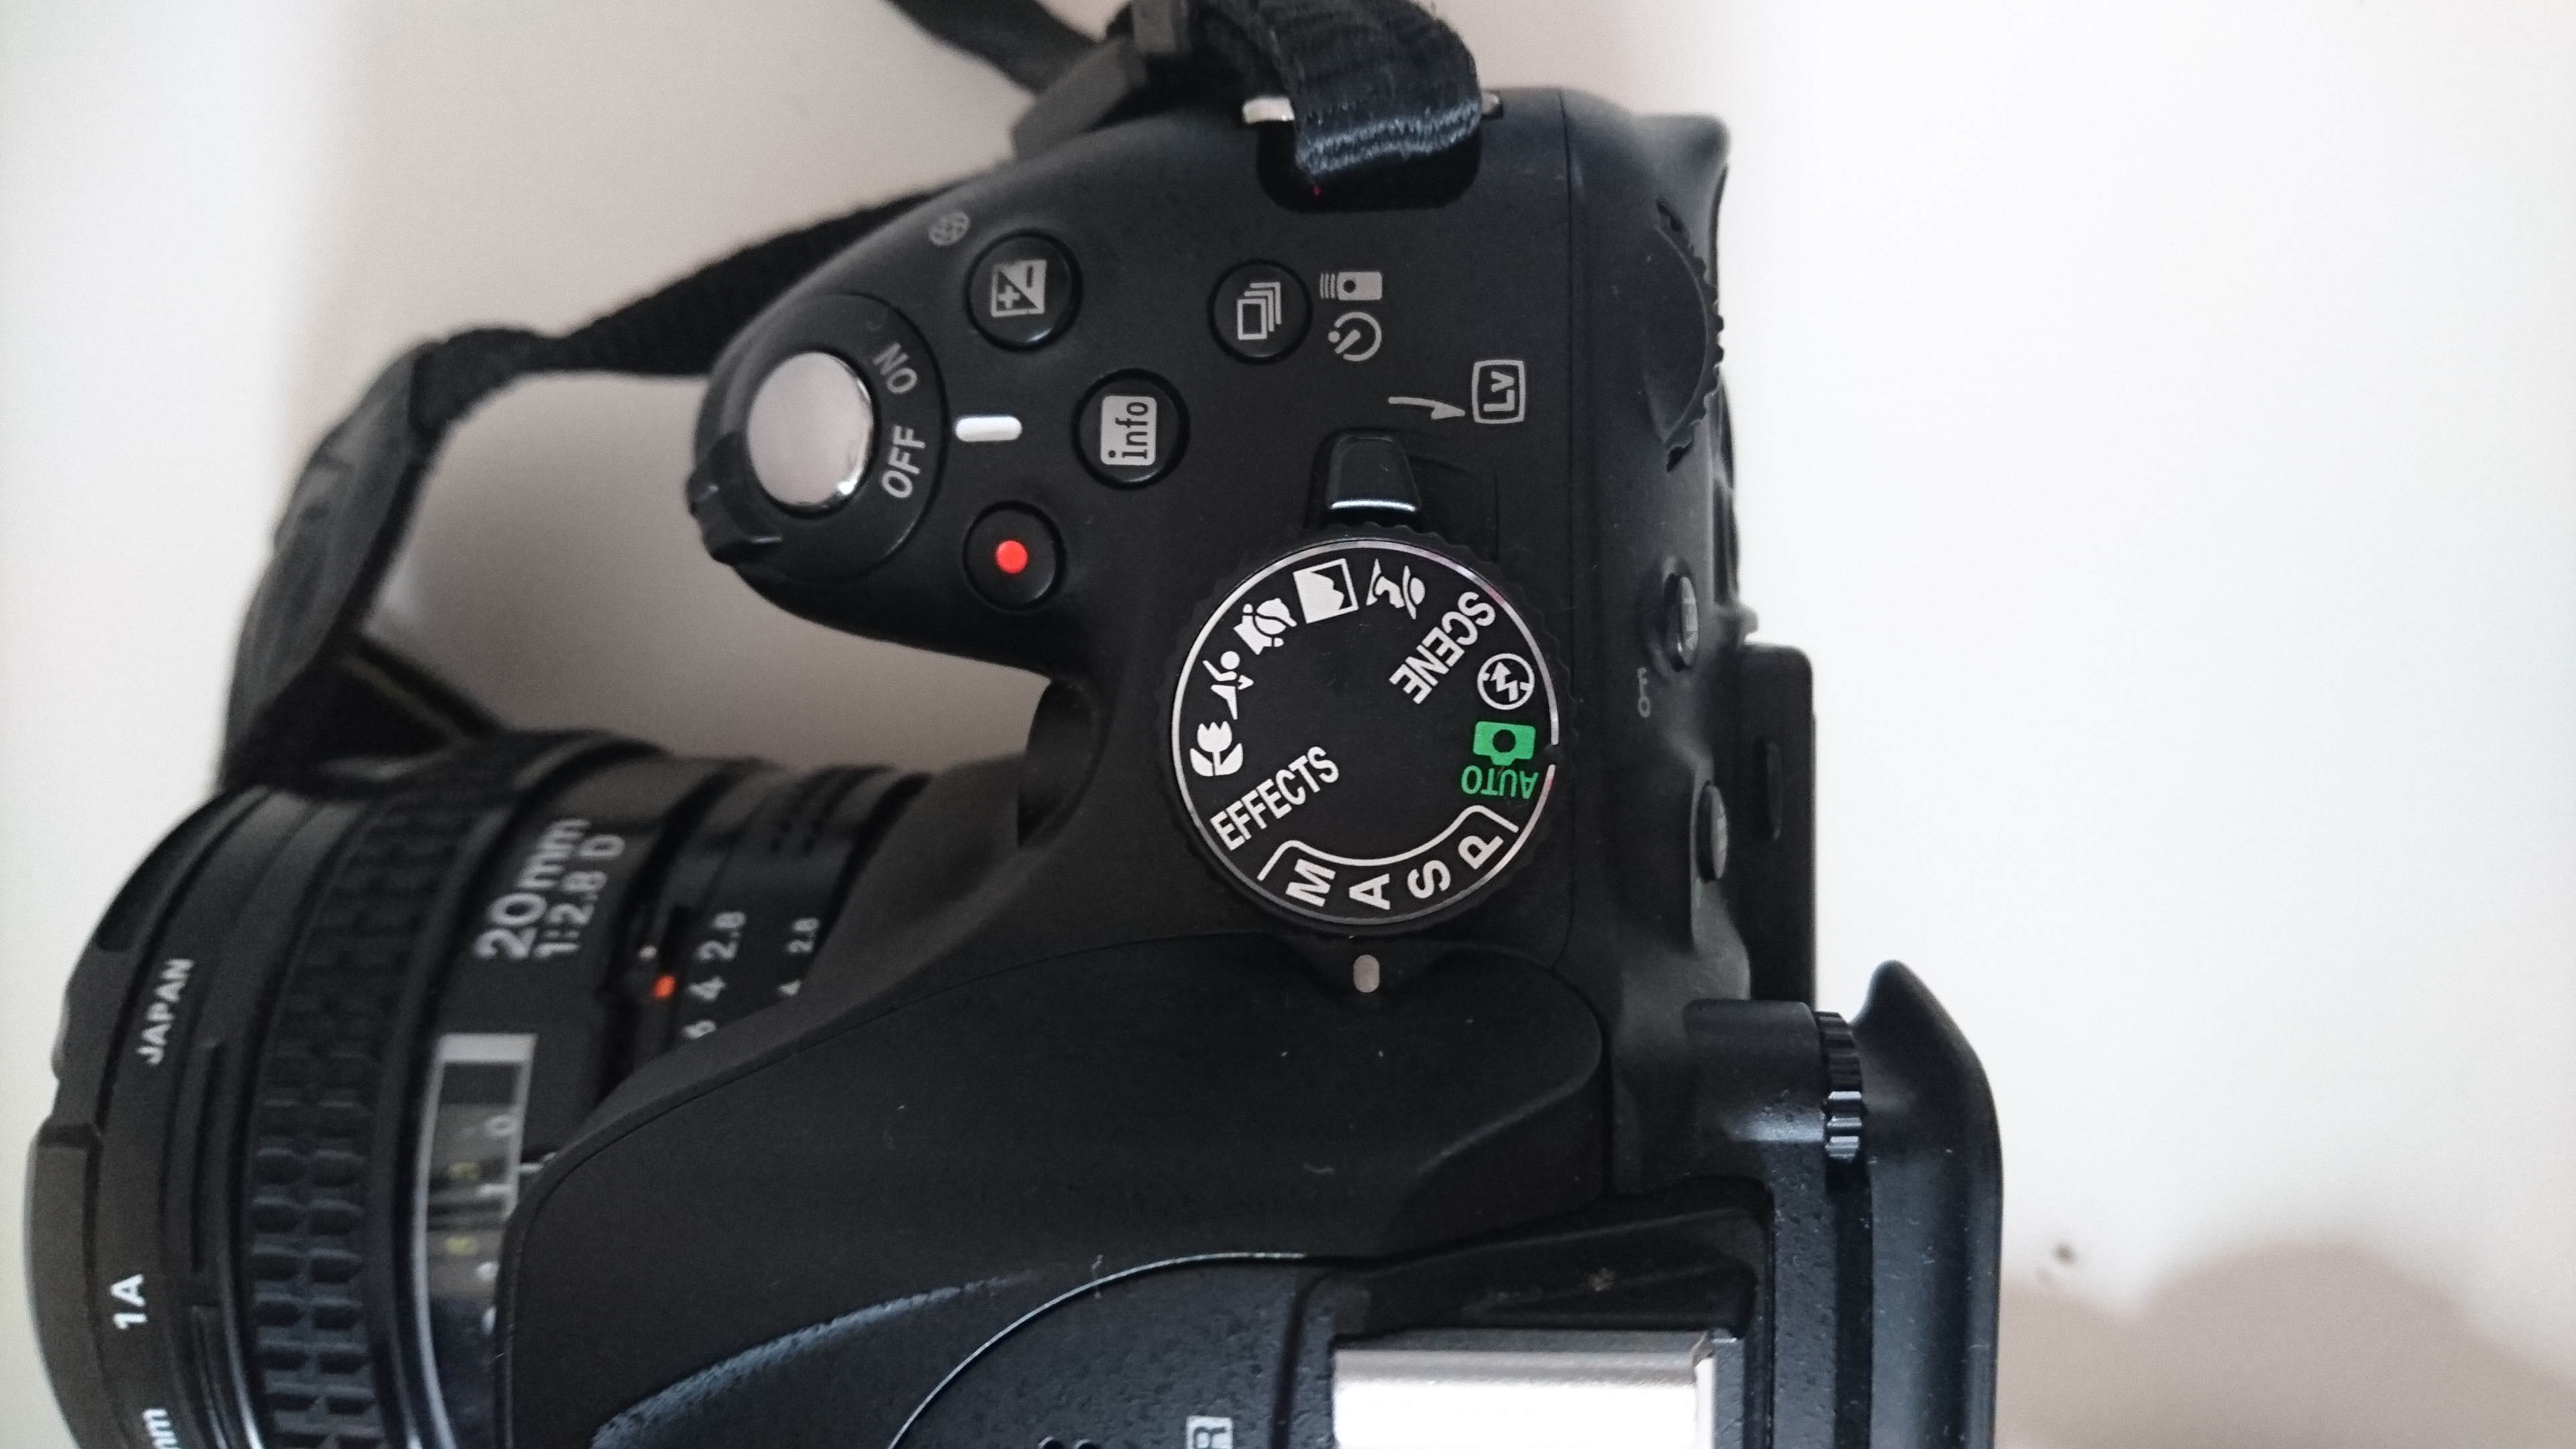
In Aperture Priority mode, you choose the aperture (AKA depth of field – how much light is let in and how much is in focus). With indoor natural light photography, you need to let in as much light as possible. To do that, you’ll want a wide open aperture. The lower your aperture number (f-stop), the wider your aperture is open.
But make sure you keep an eye on the shutter speed and adjust accordingly. You don’t want it to be too slow otherwise your images will come out blurry, especially if you have shaky hands like we all get sometimes. Personally I don’t like to have mine slower than 1/125 of a second.
When you use a wide aperture, your depth of field will be shallow. So your subject will be in focus, while your background is soft and blurry. This adds a beautiful effect to portraits.
For portraits, an aperture of around f/5 or f/6 will keep the entire face in focus. Focus on the eyes for best results. If your camera / lens allows you to go lower (e.g. f2.8) then you’ll get one eye in focus.
Top Tip: Also shooting in RAW is better than JPEG for indoor natural light. RAW files give you a lot more to work with when editing. (However this needs software to be able to edit RAW files specifically)
Aperture Priority is marked with either an AV or an A (Nikon cameras). To adjust the setting turn the small dial.
4. Choose your White Balance
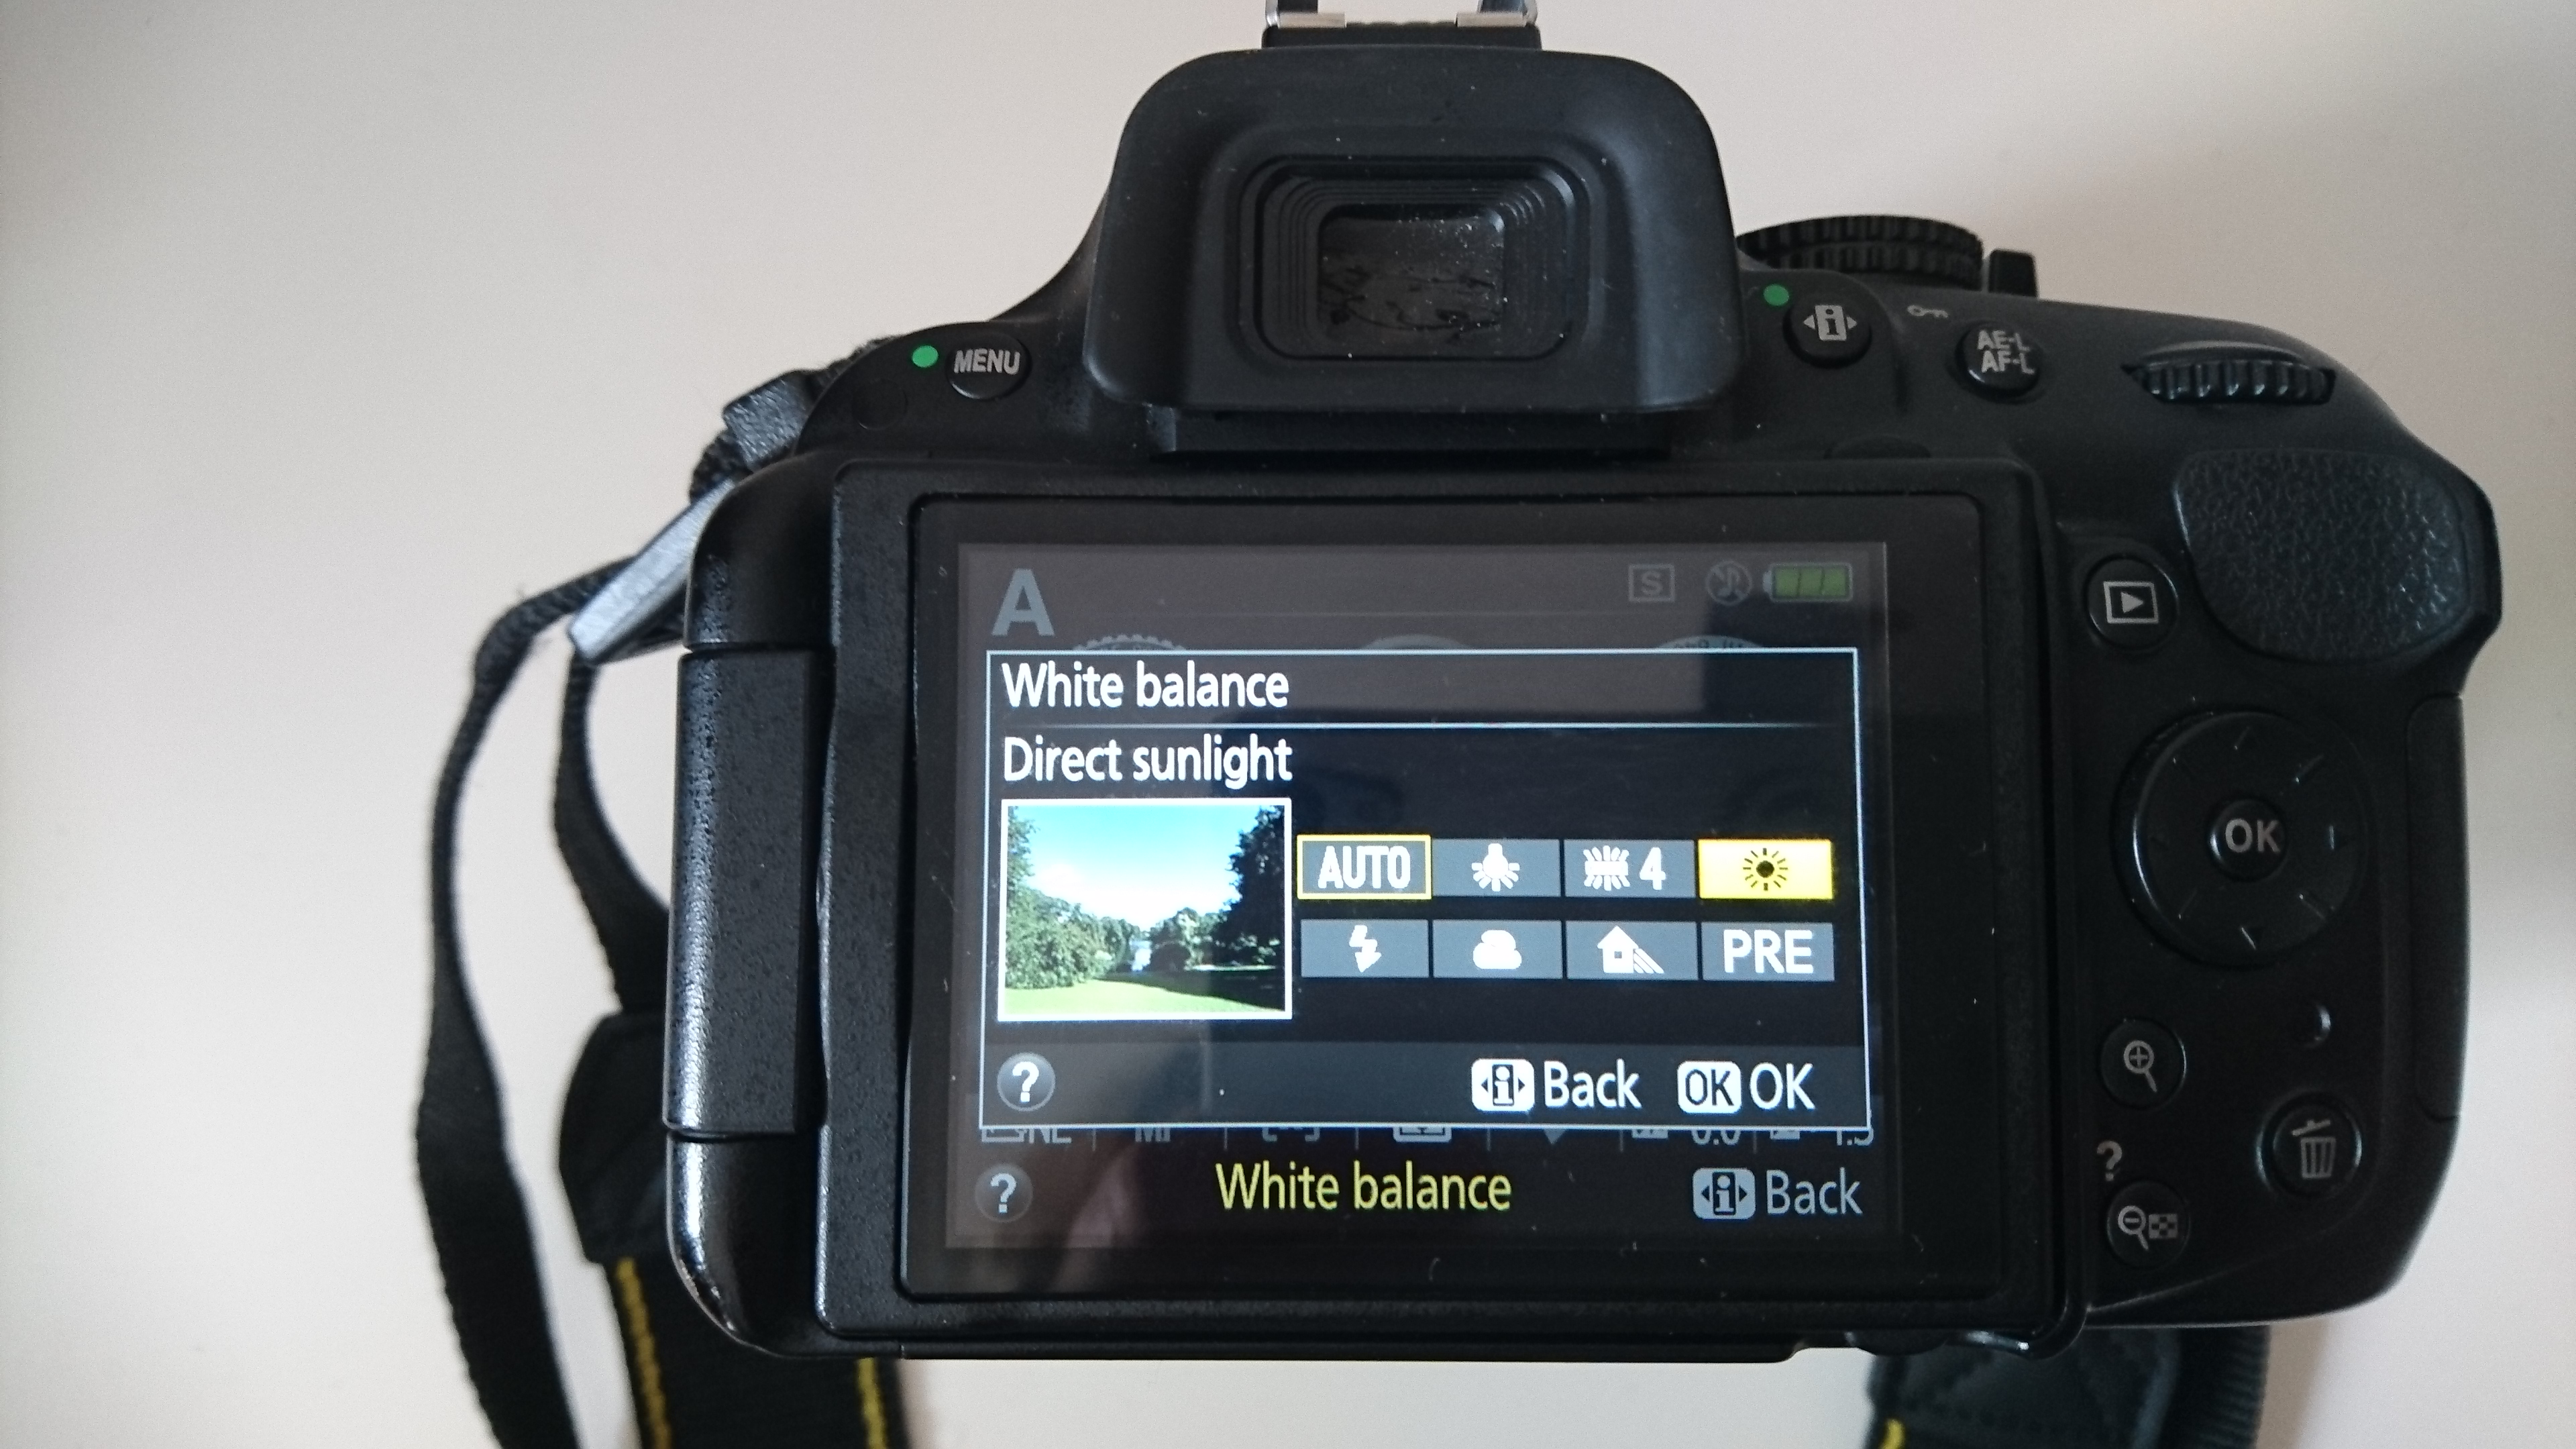
To get good white balance take your camera out of Auto White Balance (AWB).
For proper skin tones choose Daylight (the one with the picture of the little sun), as long as your subject is in front of natural light. This will give good results, not too blue and not too yellow.
If you want to warm things up a little, choose Cloudy (this works best using natural light outside). This will add more yellow. Try a shot with Daylight, then one with Cloudy, and see which looks right or which you prefer. If you’re shooting in a room with fluorescent light, then the fluorescent white balance setting may be more accurate.
You can adjust your White Balance while editing (if you shoot in RAW) but getting it right while shooting makes editing easier.
5. Use a light catching backdrop

A backdrop will help catch the light and bounce it back on your subject. Perfect for product or portrait photography
6.Use a reflector

A reflector is used to bounce natural light back on your subject.
I frequently use a reflector in my indoor photography especially if the window isn’t that big, so my subject is getting harsh unflattering shadows on their face.
You can get the same result from a big piece of white card or paper – you don’t have to go out and buy a professional reflector.
7. Use a mirror
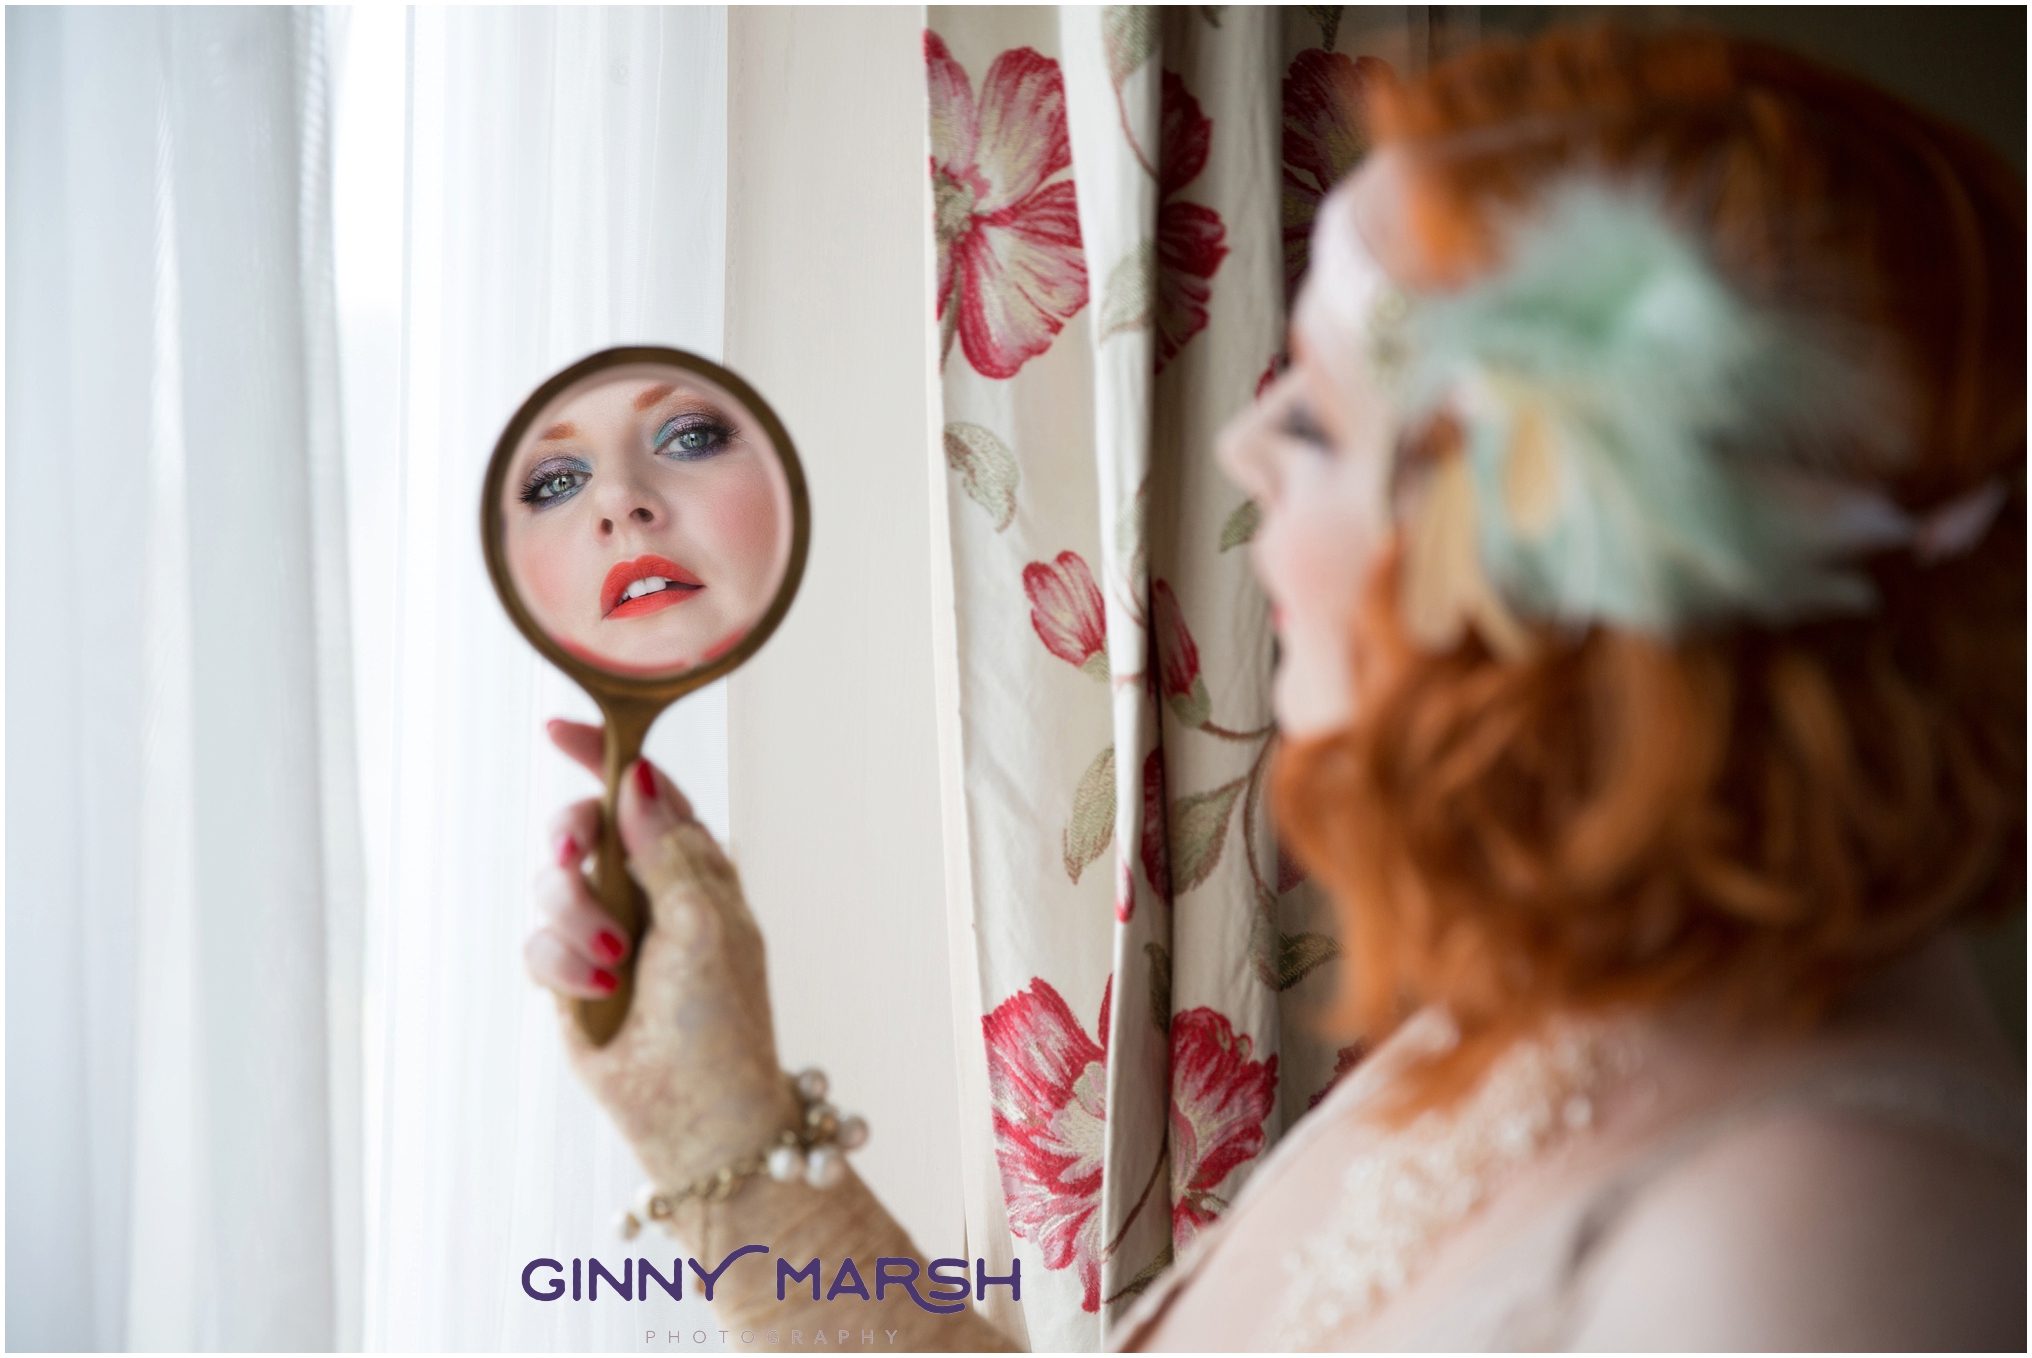
A mirror is another great way to control natural light. Hang or place a mirror in the window.
If you want a more arty look to your photographs with your model, a good idea is to have your model look in the mirror. As you take your shot make sure your reflection is not in the mirror. It can take some patience to get the angles and reflections under control, but it’s worth it.
8. Tidy up
There are often things lying around the house, especially if you have kids. This clutter can be distracting in a photograph. It’s worth taking a couple minutes to tidy up before you start shooting.
In a small space, a backdrop can serve a double purpose. It will control light and create a blind to background clutter. It can help make a small space more workable.
9. Place your subject close to the window
Place your subject a foot or two away from the light source, with the window behind you. This way you’ll make the best use of the natural light.
But make sure you avoid the harsh shadows that can be created by being too close to the window, or if you are shooting with a model sometimes this is a good look.
Try different positions such as backlit (with the light behind your subject to add a silhouette style to your image), side lit (side on to the light).

10. Be Creative and Have Fun!
It’s easy to love indoor photography
The setup is inexpensive, portable, and easy; and you can create beautiful photos no matter the weather or time of day. Don’t forget to have fun, and let that inner beauty shine through.
I hope you find my tips for Indoor photography helpful! If you have any questions about anything mentioned in this blog then please don’t hesitate to email me at kimberley@ginnymarsh.co.uk
Kimberley x
Thanks so much for stopping by to read my blog! If you or anyone you know would like to have Wedding photography, or a portrait shoot for yourself, your business or your family, please Contact Me as I’d love to know how I can help you.

Leave a comment